| ! | Non-canon alert The subject of this article originates from non-canonical sources. To learn about what is considered "canon", see LOTR:Canon. |
! |
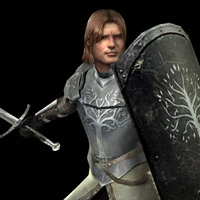
Berethor, guard of Gondor
Berethor is one of the six main characters of The Lord of the Rings: The Third Age (game). Following Boromir, Captain of the Guard of Minas Tirith, he fights his way through the game. Berethor, along with Hadhod and Idrial, also appear in the EA's The Lord of the Rings: Battle for Middle Earth II as pre-made custom heroes.
Former Life
Before he jumped into the adventure of The Third Age, Berethor was the captain of the guard of Gondor, the twin brother of Beregond, also a captain of Gondor. He fought with Boromir and Faramir in Osgiliath and fled together with them. Called unworthy to fight for Gondor, he was banished by the Steward of Gondor, Denethor. After Boromir left for Rivendell, Berethor went after him...
Adventure
Synopsis
During the adventure, Berethor will get new weapons and skills, and he falls in love with Idrial, (an Elf-maiden of Lothlórien). They meet a few other soldiers and kinsmen who join them, including a Dúnedain Ranger named Elegost, a Dwarf Warrior from Erebor named Hadhod, and Eaoden, a spearman in Theoden's Royal Guard. He gets to know more and more about his (and his companions') past. Then, Berethor meets a Rohirrim shield-maiden named Morwen. Again Berethor falls in love, this to the frustration of Idrial. At the end, Berethor will go with Morwen to start their own adventure. However, it is possible that Berethor, along with the rest of his company, died at the end of the game. The final battle was with Sauron, atop Barad-dûr. The cutscene after the battle showed Barad-dûr collapsing. It is possible that the company was still atop the tower when it was destroyed, and Aragorn tells Berethor that they were to march upon the Black Gate, a short time before the ring was destroyed. And with Barad-dûr being over 5000 feet tall, they would have had no time to escape the tower.
Chapter one - Eregion
Journey to Rivendell
At the start of The Third Age, the player follows the journey of Berethor, as he follows Boromir to Rivendell. While Boromir sits the council, Berethor is ambushed by a group of Nazgûl, who were probably seeking to assail Boromir. Berethor fights bravely, but is overcome and wounded by the Nazgûl. Before they can deliver the killing blow, however, Idrial rushes to his aid, subduing the Nazgûl with water magic. She then revives him with a gift of the elves, after which Berethor declares himself in her debt. They then set off to an elven way-station to heal his wounds and equip him for the long road ahead...
The mountain pass
In the mountain pass, Berethor and his elven companion came upon a ranger called Elegost. After clearing the pass full of Wargs and Orcs, they set upon a quest to track down a mordor orc and his band, who stole a map from Elegost. At first the Gondorian didn't trust the ranger and vice versa, only Elegost gained some trust in the Gondorian after Idrial voiced for him, in name of the lady of the light. After the group rescued the elven altars from corruption and finding the map, they went back down the mountains, in search of Elegost's friend.
The journey to Moria
When they got back down, Elegost tracked his dwarven friend and the group was able to find him, deadlocked in a battle with a troll. Thanks to Berethor's sword the party could withstand the troll's fury. Following the fellowship, the party set out for Moria.
Chapter Two - Western Moria
The Entrance Halls and Mine Galleries
The Fellowship encounters the Watcher in the Water just before and after they enter Moria. Both times, Idrial and Hadhod use water and fire powers (respectively), and Elegost uses his deadly arrows to defeat the Watcher. The first time, the Watcher gets angry and destroys the rubble blocking the gateway into Moria, allowing the Fellowship to flee inside. The second time, they actually succeed in defeating it. Hadhod is devastated by the desecration of the Goblins, and vows to get revenge. A little while in a true cave-like section of Moria, they discover a chest with one of seven ancient runes, which supposedly lead to a great treasure. In the mine galleries, they fight and slay a Goblin Shadow Chieftain. Hadhod and Elegost discover a map that leads to the great Mithril pit of Moria, and soon Berethor's party set off for the Necropolis, fighting many Goblins and some Wargs along the way. Unlike the Fellowship of the Ring, who was forced into Moria and desperate to find a way out as quickly as possible, Berethor's party is willing, almost eager to discover Moria's secrets (at the urging of Hadhod). They plan to take their time to discover Moria's secrets despite its terror...for now.
The Necropolis and the Right Path
Berethor's Company soon arrives at a huge necropolis, and begin searching the small chambers in the great halls. Many of these chambers contain ambushes by both Goblins and Wargs, but Berethor and his party soon defeat them all. During the search they discover two more ancient runes. The Party then arrives at the Crossroads that the Fellowship had previously reached. After brief deliberation and rest, the party decides to choose the right path (which leads downward). This path leads to the great Mithril Pit of Moria. The Fellowship, seeing a way out in the far distance and collecting another rune in a chest, make their way to the far area. Before they can get there, however, a goblin body falls to the ground in front of them. Gandalf scolds Pippin (high up in the Chamber of Mazarbul), and Idrial picks up a key presumably leading to the Throne Room. The Balrog soon makes its appearance. It doesn't see Berethor's party, but it does smash the path leading to the exit. This alerts the Goblins and six warriors ambush the Company, surrounding them. The Company fortunately survive, and make their way back to the necropolis despite four more attacks. The company has now discovered the terrifying truth about Moria, but they are still willing to explore its various secrets...for now.
The Throne Room
After escaping back to the Necropolis, the Company proceed to the left path. This leads to an immense cavern consisting of high walls/ceiling and a pit, which is spanned by a mighty bridge. While crossing, they are occasionally ambushed by Goblins. After the Company enter the Antechamber (again being ambushed by Goblins and discovering an ancient rune), they cross to the Throne Room. This particular room is held by an archer, a warrior, and a mighty Goblin sorcerer, called a Moria Goblin Shadow Commander. The Company defeats this attacking party and reads Moria's Book of Secrets, using the key they found on the Goblin body. An ancient door with symbols is discovered, and a key to some ancient sealed door revealed. The Company then checks an adjacent room, finding the last axe forged in Moria and another ancient rune. After brief ambushes, they make their way safely back across the huge pit cavern and back to the necropolis.
The Left Path - Tomb of the Ancients
There is only one path left for Berethor's Company, the Left path. This leads to the final ancient rune and a majestic tomb. The Company slay all the Goblins and Wargs in the area, and use the runes to open up the tomb. Inside, there is a suit of ancient armor made by the Dwarves long ago. Hadhod decides to wear it in honor of his Dwarven people. There is a sealed door a little to the left, and Idrial incites the spell written on the Book of Secrets. The ancient door opens, and the Company proceeds to the halls of Dwarrowdelf.
Halls of Dwarrowdelf
While viewing the majesty of these ancient halls, the Company slowly make their way across, fighting Goblins and opening various treasure chests. At the end of the road lies the entrance to Balin's Tomb. The Company enter inside only to find five Goblins. After a fierce battle, all the Goblins are successfully slain.
Eastern Moria
Balin's Tomb
Berethor's company enter the now-deserted Balin's Tomb, seeking an escaped goblin. The said goblin jumps right in front of them, ready to attack, but the Balrog suddenly breaks in the eastern wall of the tomb. The company instantly hides in various parts of the tomb, while the goblin is incinerated. The Balrog then leaves seeking Gandalf, and Idrial warns that the Company must find him first.
Crossing the Dwarrowdelf
Berethor and his company being making their way to the door at the opposite end of the Dwarrowdelf hall. They begin discussing the sheer might of the Balrog, while escaping various Goblins and a Troll, including another surrounding fight. Along the way, they discover various treasures including Balin's Walking Axe. When they reach the end of the hall, they make their way through to find a huge chasm spanned with small bridges.
The Mighty Chasm
The Company proceeds over the chasm, defeating any Goblins they encounter. At a huge chamber they see a Dwarf Lord statue. Hadhod apologizes for the desecration, and Idrial promises to help clear out the Goblins. A troll and Goblin archer scout see them, but they kill them before they warn the others. After a bit Idrial almost falls into the chasm, but Berethor saves her. They proceed up the stairs into a different part of the Dwarrowdelf.
Attacking the Goblins
Soon afterwards, the Fellowship proceeds to find a different way out of Moria, destroying many Goblin rituals and gatherings along the way. Their first challenge comes when they arrive at an ancient Balrog altar, where a Shadow Commander is leading a ritual for the Balrog. The Fellowship slowly defeats the shaman and moves on. Their next challenge is a Goblin drummer, who summons more Goblins from the depths. After slaying him, they proceed to the ancient Mausoleum of the Dwarves. Berethor and his company eventually makes it to an ancient Dwarven tomb, where they slay many Goblins and find ancient Dwarven treasure.
Escaping Moria and Battle with the Balrog
With increasing desperation and hope, the Company proceeds towards the same chasm, though now with access to the Bridge of Khazad-dum. During their escape, they discover an ancient golden Lorien helm and slay the last of the nine great Cave Trolls of Moria. They see Gandalf battling the Balrog and rush to help. When they arrive, they prepare to battle. Knowing that their own chances of survive are very small, Berethor and his company mainly use their skills to weaken the Balrog and support Gandalf, while Gandalf does the actual work attacking the Balrog with his "Bolt of the Valar". After a long time, the Balrog is finally defeated and both he and Gandalf fall into the chasm. The Company hurries to escape Moria, finally fleeing its dark halls and Goblins.
Chapter 3
Chapter 4
Chapter 5
Abilities
Berethor is the "leader" of the company, which is the reason he is the only person to have Leadership Skills. His primary skill, though, is Sword Craft, which allows him to use powerful attacks that stack with his already high strength rating.
Later in the game, Berethor acquires a handful of swords with the Biting Blade ability as well as several with the Weeping Blade ability. These abilities replace his normal Attack. Weeping Blade does damage over time, while Biting Blade gives some of the damage Berethor inflicts on his opponent back to him in Health Points (similar to Eaoden's Drain Health). Weeping Blade and Biting Blade also replace Berethor's Counter Attack. This is very useful; when Berethor is attacked, his counterattack allows him to gain some of his lost health back.